
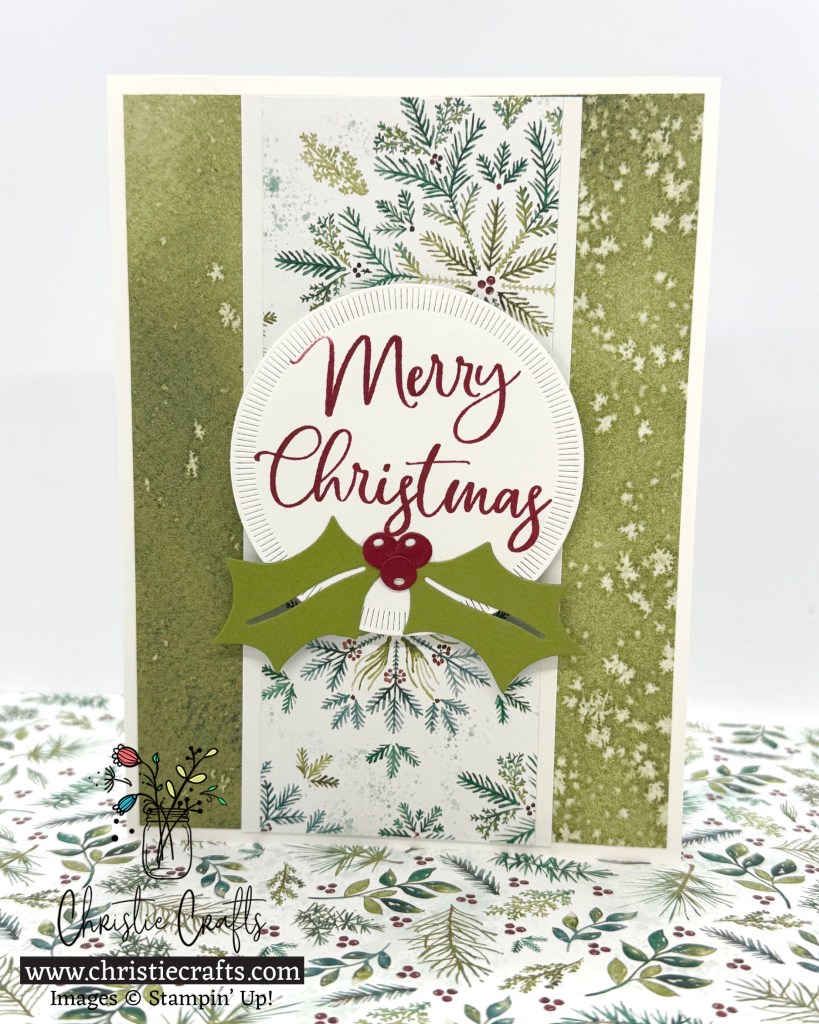
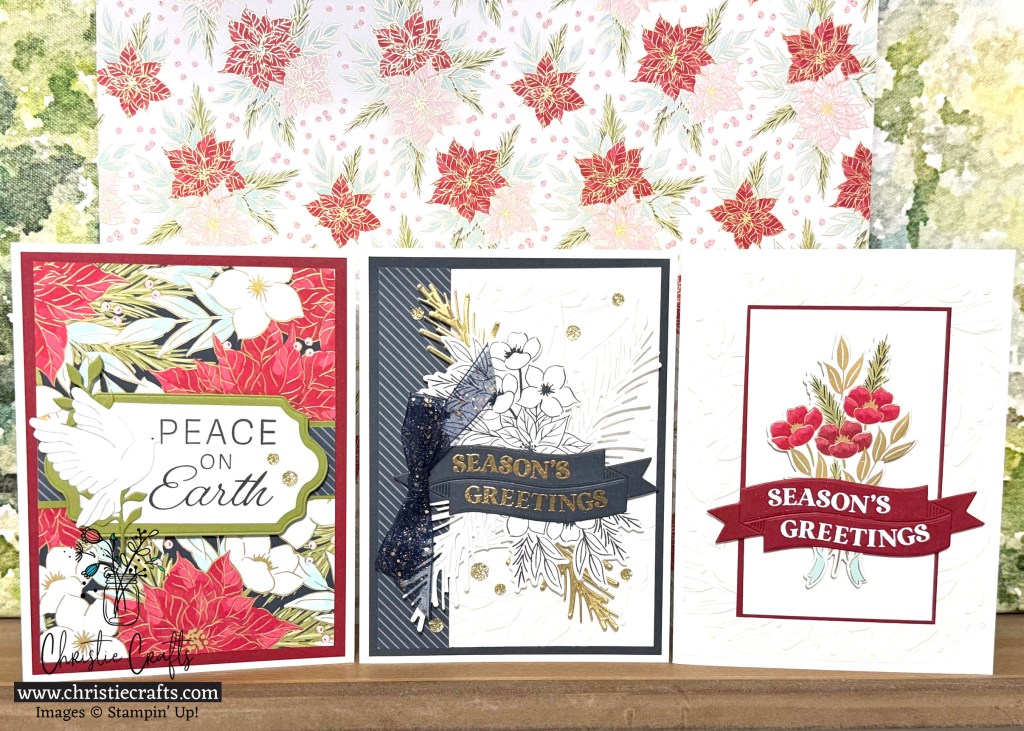
Hey y’all! Ever need a bunch of cards fast? The Elegant Pine Snowflakes Designer Series Paper inspired me to whip up this beautiful batch of Christmas cards that come together in no time. The paper patterns are so soft and sophisticated, you can mix and match them for a coordinated set that still feels extra special.
These cards make fantastic gifts! Tie a few together with ribbon for a handmade card bundle or use them for your own mailing list. Either way, they’re simple, elegant, and perfect for spreading holiday cheer.
Elegant Pine Snowflakes
Merry Christmas Cards Tutorial
Supplies
- Stamp set: Any bold “Merry Christmas” sentiment (script works beautifully)
- Dies/Punches:
- Large stitched or detailed circle die—Spotlight on Nature Dies (163580)
- Holly leaves & berries dies or punch—Christmas Greenery Dies (165872)
- Paper:
- Thick Basic White (166780) card base and sentiment circle
- Elegant Pine Snowflakes Designer Series Paper (166066) multiple patterns
- Old Olive (100702) or Mossy Meadow (133676) cardstock for holly leaves
- Cherry Cobbler (9119685) or Real Red (102482) cardstock for holly berries
- Ink: Cherry Cobbler (147083) or Real Red (147084)
- Adhesives:
- Stampin’ Seal (149699) or Multipurpose Liquid Glue (110755)
- Stampin’ Dimensionals (104430)
- Embellishments: Optional
Cutting Measurements
Card Base
- Thick Basic White: 9″ × 6″, score at 4.5″ on the long side (standard A6 vertical card)
Front Layers
- DSP panels (snowy pattern): 4.25″ x 5.75″
- Center backing layer (Basic White): 2.5″ x 5.75″
- Center DSP panel (pine/foliage pattern): 2.25″ x 5.75″
Sentiment & Holly
- Sentiment circle (Basic White):
- Holly leaves (Old Olive or Mossy Meadow)
- Holly Berries (Cherry Cobbler or Real Red): Die-cut 3 small circles or use 3 red embellishments
Step-by-Step Instructions
1. Prepare the Card Base
- Score the 9″ × 6″ Thick Basic White at 4.5″ and fold to create a side-folding vertical card.
- Burnish the fold with a bone folder for a crisp edge.
2. Build the DSP Background
- Lay the card base in front of you portrait style.
- Adhere the 4.25″ x 5.75″ snowy DSP panel to the center of the card front, leaving an even white border all the way around.
- Adhere the Basic White center backing panel (2.5″ x 5.75″) in the center of the card front,
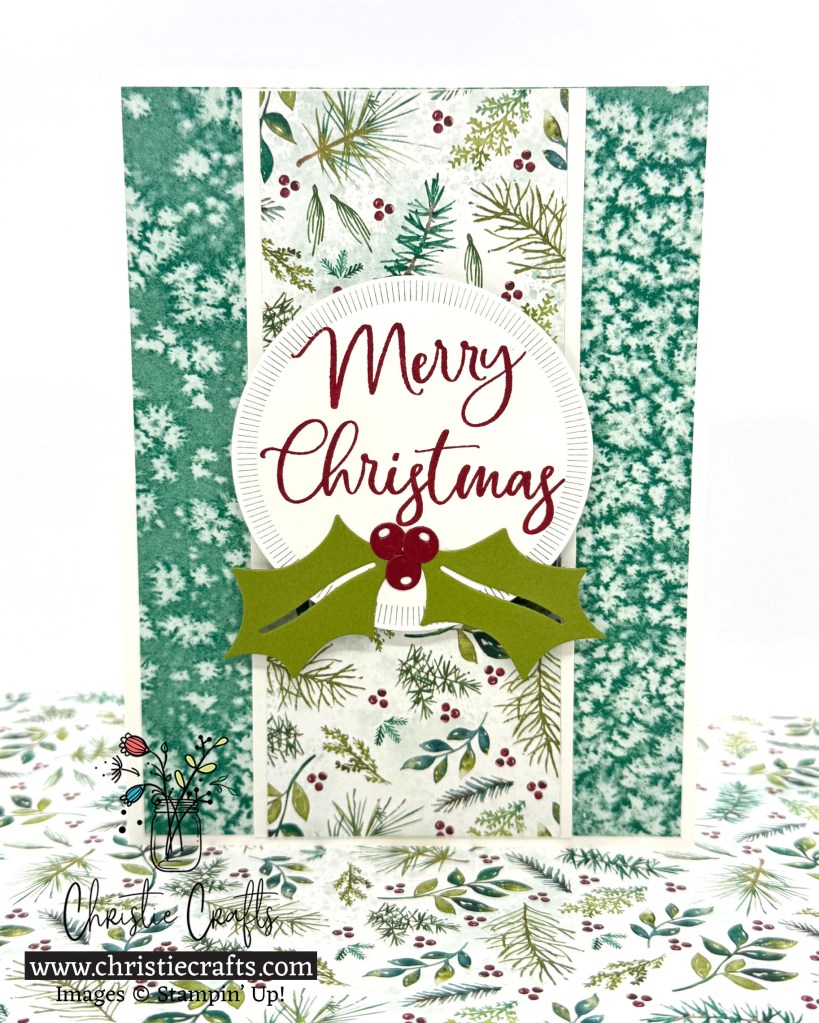
- Add the pine/foliage DSP strip (2.25″ x 5.75″) centered on top of that white panel. This stacked center strip gives a nice framed look and makes the sentiment really pop.
- By using several coordinating patterns from the DSP, you can quickly build cohesive card sets that make wonderful gifts.
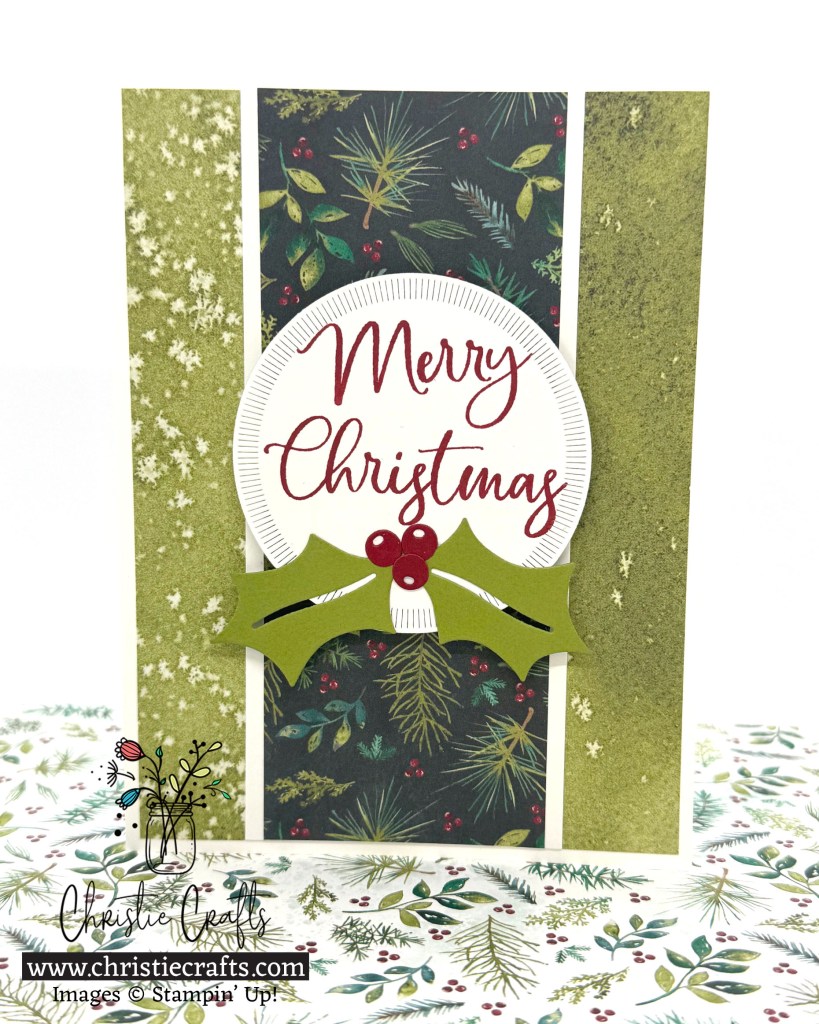
3. Stamp the Sentiment
- Die-cut a large stitched circle from Basic White.
- Ink the “Merry Christmas” sentiment with Cherry Cobbler or Real Red.
- Stamp it in the upper center of the circle.
- Set aside for just a minute to dry so you don’t smudge that pretty script.
4. Create the Holly Accent
- Die-cut the holly leaves from Old Olive or Mossy Meadow cardstock.
- Die-cut 3 small berries from Cherry Cobbler or Real Red, or set aside 3 red gems/embellishments to use as berries.
5. Assemble the Focal Point
- Add Stampin’ Dimensionals to the back of the sentiment circle.
- Center it on the card front, slightly lower than the vertical middle so you can still appreciate the DSP patterns above and below.
- Use adhesive to adhere the holly leaves across the bottom part of the circle.
- Add the berries in a cluster where the leaves meet. If you’re using red gems, pop them right on top for a bit of shine.
6. Finish the Inside & Envelope (Optional but Cute!)
- Add a 1/2″ × 4.25″ strip of coordinating DSP along the bottom of the inside the card.
- Stamp a small pine sprig or berry image in one corner to tie everything together.
- Add a matching DSP strip to the envelope flap and trim to fit.
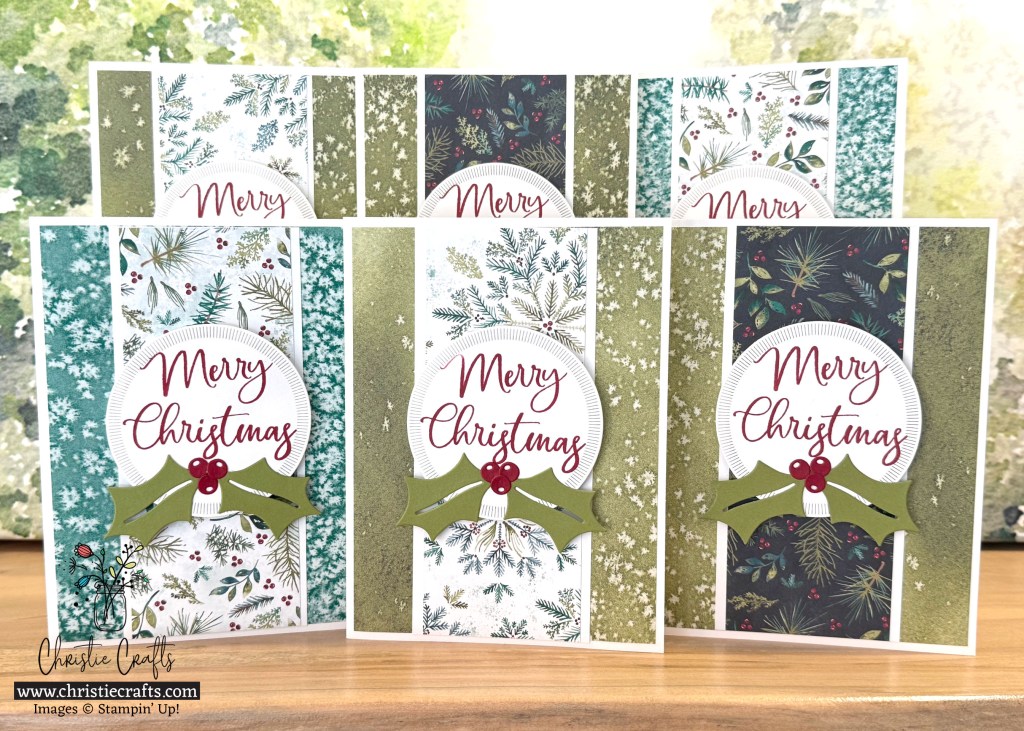
Making a Whole Set
- Cut all your card bases at once.
- Then do all your DSP strips, then die-cut circles and holly, then stamp sentiments assembly-line style.
- By the time you’re done, you’ll have a gorgeous stack of coordinated Merry Christmas cards ready for gifting or for that big holiday mailing list!
Head over to the Christie Crafts YouTube channel to catch a quick video short for this card! I’ll walk you through each step to show just how fast and easy these come together. It’s a clean, simple design that adds the perfect handmade touch to your holiday cardmaking!

Thanks so much for stopping by today! I hope you’re heading out with a spark of inspiration for your holiday crafting and some fresh ideas for using the beautiful Elegant Pine Snowflakes DSP. If you have any questions about the products or techniques I used, feel free to email me at christie.king@gmail.com or leave a comment below—I’d love to hear from you and see what you’re creating! And don’t forget to subscribe to my weekly Christie Crafts Newsletter for more inspiration, project ideas, and all the latest Stampin’ Up! news.


Leave a comment